13
2015
Track Expenses for Your Company & Generate Profit & Loss Report
Managing and tracking expenses with an online expenses tracking software can help reduce expenses by 20 percent or more.
According to a recent Forrester survey : 69 percent of surveyed mid- to large-sized businesses view cloud-based expense management software as beneficial to cost reduction, believing such products could help reduce expenses by 20 percent or more.
Not only you can save details of actual expenses incurred, as all are easily recorded within the system, but you will also save time not having to go through all the receipts you have in your pile of papers save your self the trouble for looking for them, just take a snapshot of the receipt and upload it to your expenses manager.
In this tutorial we will explain how to manage your company’s expenses step by step and creating a P&L report.
To activate the expenses tracking function in your online invoices system:
- login to your account using your sub-domain or register for a free account from HERE.
- From the “Settings” menu Choose “Plugin Manager“.
- Tick the “Finance” check box and click the “Save Settings” button.

- Once Activated the “Finance” will appear in the menu bar.

To Start Track you business’s expenses:
- From the “Finance” menu choose “Expenses”.
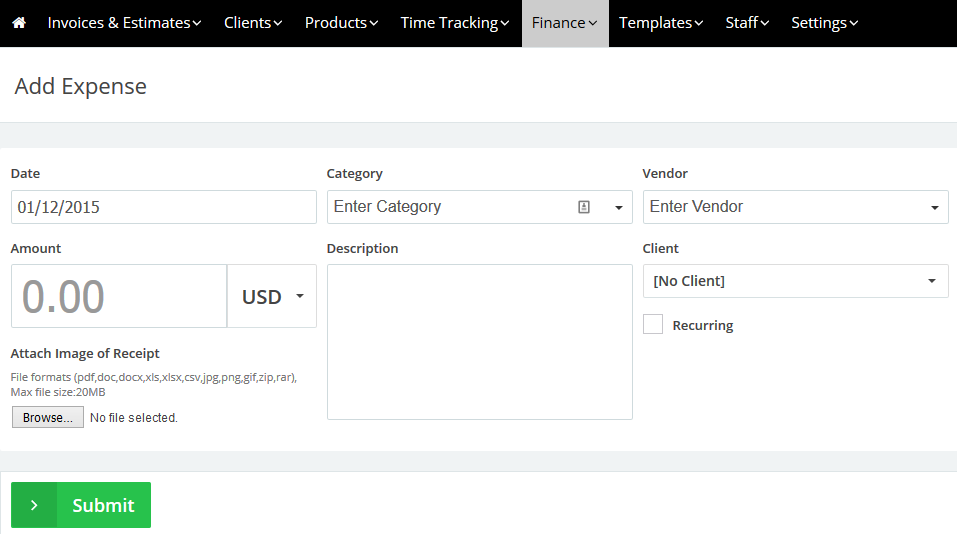
- Click the “New Expense” button.
- Start adding your personal or business expenses – check this link “Creating Expenses in online invoices” for more detailed info.

Using paper to track expenses or other ‘old school’ methods is very time-consuming and painful, but all you have to do now is to take a snapshot of your receipt, upload it to the system and fill its details. Just a few seconds and you are good to go. Also you can set the ‘recurring’ option to generate expenses on a daily, weekly, monthly basis for expenses like office tools, bills,etc … allowing you to save even more time and effort tracking your expenses.
Pro Tip: Monitor your expenses using the EasyInvoices expenses report. Generate weekly, monthly and quarterly reports to examine your expenses and make sure they are in line with your budget.
If you are a business owner and have staff members who add their expenses in the system you can follow their entries with ease. Follow these steps to monitor your staff members’ expenses:
The First Method:
- From the “Finance” menu choose “Expenses”.
- From the “Quick Search” are click the “More Options” button.

- From the “Added By” Drop down menu choose the staff member for whom you want to view recent expenses.
The Second Method:
- From the “Finance” menu choose “Expenses Report”.
- From the “Added By” Drop down menu choose the staff member for whom you want to view the expenses report.

- Click the “Show Report” button.
- This will show a report for all expenses added by this staff member. You can customize this report using any of the other criteria like category, vendor or time range.
Pro Tip: Record your expenses as soon as possible so you don’t lose any of your receipts (or worse – you end up with a pile of receipts).
Generate a Profit and Loss report:
What is a Profit & Loss Report (P&L) ?
The Profit and Loss report is a summary of the financial performance of a business over time (monthly, quarterly or annually is most common). It reflects the past performance of the business and is the report most often used by small business owners to track how their business is performing.
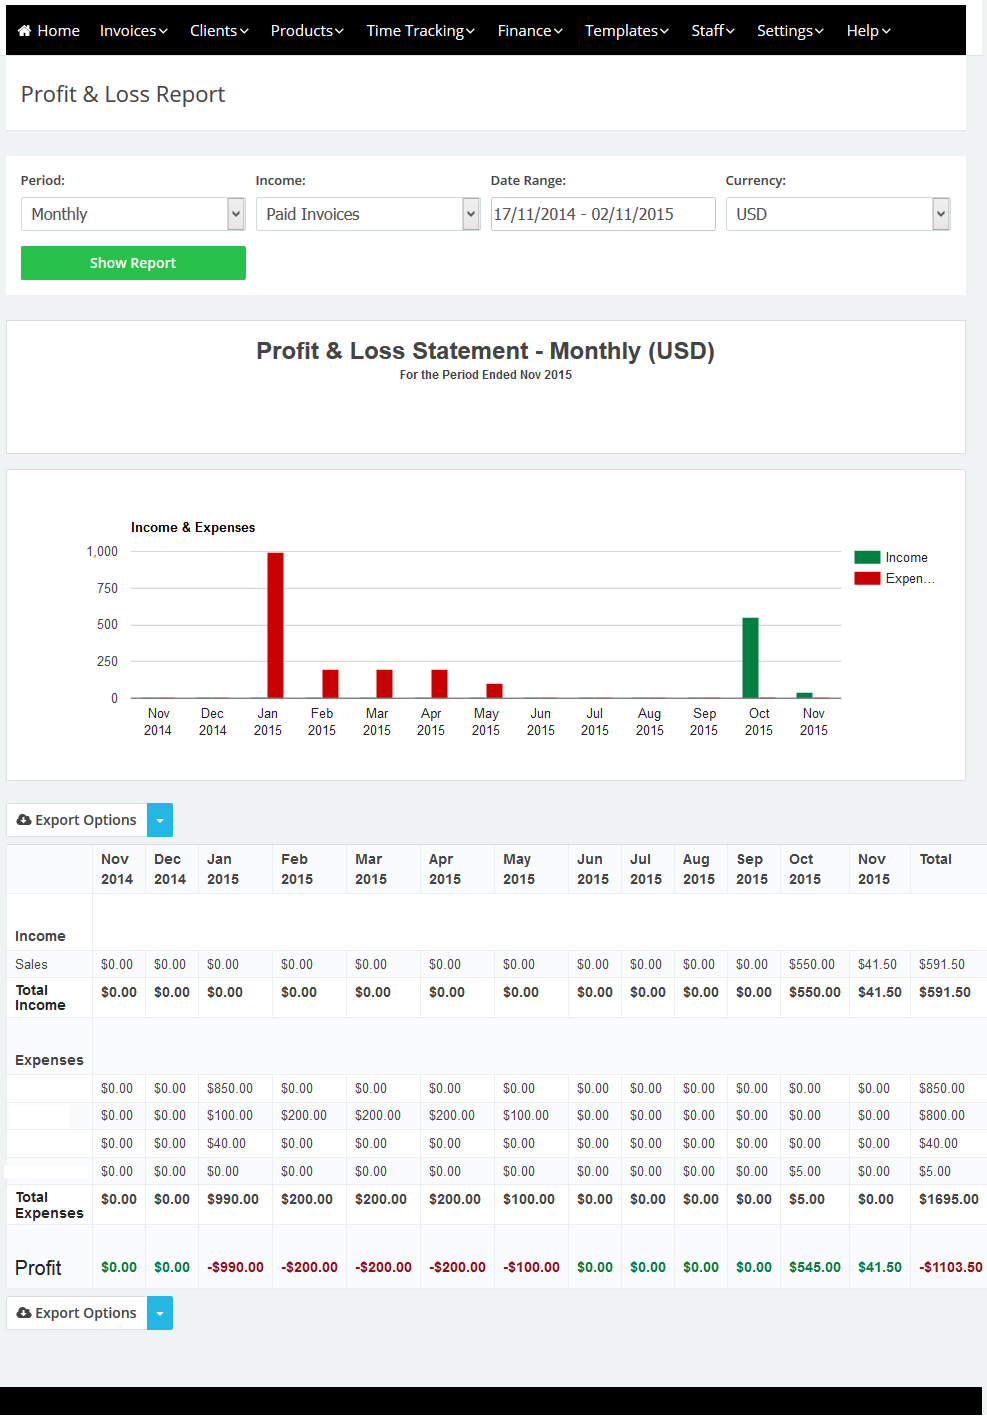
- Choose a Period: Monthly, Quarterly (3 months) or Yearly.
- Income: Choose to include only paid invoices in the income or all invoices. If you want to add another type of income like salary just make an invoice, add in a product as ‘salary’ and mark it as paid.
- Date Range: Choose a date range.
- Currency: Choose a currency.
The report generated will show your income (from invoices) and your expenses in a graph and a table – the last field is the profit (or loss) for the selected time period.
Contact us if you have an issue or questions.

 An article by Adam


